• Skip to main content

Digital Dental Photography

Digital Photography and Workflow for Dentists

  • Home
  • Gear
    • Accessories
  • Clinical Dental Photography
    • Basic Settings
    • Patient and Camera Positions
    • Quadrants and Occlusals
    • Extraoral Photos
  • Software
    • Photo Organization
  • Portrait Photography Basics
  • Dental Websites
    • WordPress Websites
  • CE Reviews

Dental Photography

Need Creative Images but Don’t Know Photoshop?

August 24, 2014 by Charles Payet

canva icon

As much as I love Photoshop and have been using it since version CS2, and even with the awesome Photographers Bundle of Photoshop + Lightroom for only $9.99 that Adobe has now made available indefinitely, I recognize that many people simply don’t want to learn how to use it.  And while I am a huge proponent of all that Lightroom can do for organizing, editing, and presenting photos, for many doctors or team members, even that may be too daunting a challenge.  It shouldn’t be, but it is.  So what do you do?  What even I’m doing a lot nowadays: www.Canva.com

Easy Way to Create Attractive Online Images

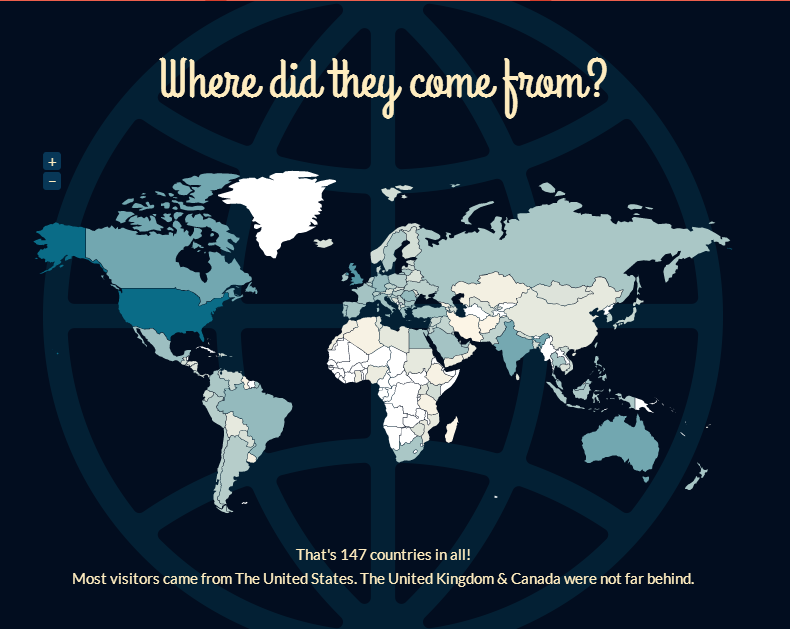
Here is a selection of images created with Canva just to give you an idea of what can be done (BTW – please remember that all of these images are ©Smiles by Payet and may NOT be used in any way without permission):

How Many Options Does Canva Offer?

Here’s a simplified list of the current pre-formatted (sizes only) options offered on Canva:

  • Twitter post (1024px x 512px)
  • Twitter cover image (1500px x 500px)
  • Facebook ad (1200px x 627px)
  • Facebook cover image (851px x 315px)
  • Google+ cover image (1240px x 700px)
  • Social media image (800px x 800px)
  • Blog image (800px x 1200px)
  • Pinterest (735px x 1232px)

And of course, you can always create and save a Custom set of dimensions for your own use.

How Much Does Canva Cost?

While it can’t compare to Photoshop in many ways, and even though the PS+LR package is ridiculously affordable, I have to admit – Canva is even MORE affordable, for the simple reason that it’s FREE!  Yes, you read that correctly – FREE (ok, with a one small caveat).

To sign up for an account costs you absolutely nothing, and if you like, you can instantly create an account by signing in with either your Facebook or Twitter accounts.  Supposedly, a Google+ sign-in is also on the way, but hasn’t arrived yet.  They have a ton of easy-to-use and attractive backgrounds, icons, arrows, etc. and text options that are completely free, and you can upload your own images to use in your creations, too, and as long as you do that…FREE!

So let’s say you don’t have an image for your topic, and you happen to see that Canva has one you like…..are they ALL free?  No, they’re not.  But for all of their non-free images, each one only costs $1.  Yup.  ONE-FREAKING-DOLLAR-EACH.  How sweet is that?  So far, because I like using all my own photos, the only stuff I usually use from Canva is free.  In fact, I put a $20 credit on my account 2 months ago because I did want a few images, but I haven’t even used 1/2 of my credit yet, and I’m approaching 50 images created in Canva.

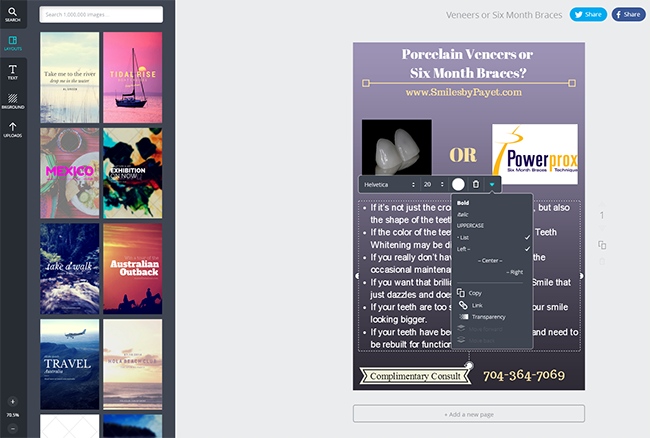
How Easy Is It to Learn?

This is the best part of Canva compared to PS or LR: it’s all drag’n’drop.  If you want to drag things around and line them up – when they line up you’ll see dashed lines connecting just which elements are lined up so you can see exactly.  How about resizing?  Just click on an image or text and the little corner/side handles appear for you to grab and resize as easily as you want.  Text?  Of course!  Pick any color from the color picker.  Outlines and shapes?  Pick from a wide variety of pre-formatted ones that can be reformatted as you like.  Upload your own images?  Easy as can be.  Layer text on top of images?  Sure!  Share directly to Twitter or Facebook, even with embedded links?  Absolutely!  (Still waiting for them to get a direct to Google+ sharing button).  Download to your own computer?  Couple of clicks and it’s done.  Create one image and then create duplicates for similarly-themed images?  Of course.  The following screenshot will give you a few ideas:

Canva screenshot


Of course, if you are proficient at Photoshop, you’ll instantly recognize that Photoshop has capabilities far beyond Canva, and it’s not like this will suddenly turn you into a professional graphic designer.  However, you don’t have to be!  You can create pleasing, attractive images and infographics quickly and easily for your website, social media, and even print if you like, and it’s fast, easy, and affordable, and honestly, it’s far more important to have something pretty good that is regularly in front of potential patients, than it is to wait and spend on perfection.


Photoshop Tip for Dentists – Remove Facial Hair and Skin Blemishes

February 13, 2013 by Charles Payet

While I do not believe it is ethical for dentists to use Adobe Photoshop to alter the appearance of their work, thus deceiving potential patients about what they can really offer, there are certain circumstances under which I believe it is not only acceptable to use Photoshop, but it may be absolutely necessary to do so.  Bear in mind – I NEVER condone the use of Photoshop to actually change anything about the treatment you provided for a patient – but AROUND your work it may be just fine.  In the following video tutorial for dentists on using Photoshop, I will demonstrate 2 techniques that you may find useful, which your patients will love, and which will enhance your photos for marketing purposes.

Use Photoshop to Remove Facial Hair

If you’ve done enough cosmetic dentistry and Before/After portraits, especially of women, you will almost certainly hear one or both of the following comments, which will always start off the same way:  “Of course you can put my portrait on the wall or your website, doctor, as long as you…..

  1. ….just get rid of all those wrinkles!” OR
  2. ….as long as you get rid of those moles/facial hair/sun spots!”

It doesn’t matter if the woman is 26 years old and the only wrinkles are in her imagination, if she sees her photo on your wall, website, Facebook page, etc. and hates it, you will never hear the end of it. Of course you should use a solid Photo Consent Form, but I always let a woman proof her final photo before I print it or put it on the wall; why take a chance?  Guys usually couldn’t care less, and let’s be clear….these tips should only be used for womens’ portraits 99% of the time unless a man specifically requests something.  

Photoshop Elements 11 or Photoshop CS6 ?

The video tutorial to follow is done in Photoshop CS6, and I’ve been using the full version of Photoshop (PS) since version CS2; prior to that, I used Photoshop Elements.  The current version of  Elements (PSE) is version 11, and it is a pretty powerful and very affordable program if you don’t want to spend the money on Photoshop, and you should be able to do these edits in PSE, too.  I just personally prefer the full version.  I find that Photoshop Lightroom (LR) is more intuitive program to learn, as everything is laid out more easily.

How to Reduce or Eliminate Unwanted Facial Hair, Sun Spots, and Moles

There are only 2 tools you will need for this exercise:

  • Duplicate Layer
  • Clone Tool on “Lighten” Mode or “Darken” Mode


Convert Film X-rays to Digital Photos

January 1, 2013 by Charles Payet

I was just asked a question on how to take digital photos of film x-rays in order to digitize them, and realized this is a frequent question on DentalTown that can easily be answered.  Fortunately, it’s quite easy!

How to Take Digital Photos of Film X-rays

There used to be some flatbed scanners available that could be used to scan individual x-rays, panoramics, and full-mouth series, but as I understand it, those are fairly expensive and not easy to find any longer, probably  because the demand wasn’t very high.  So if you want to digitize your old film x-rays to load into your PMS, whether for simple archiving and space storage, or to make it easier for your team to access them quickly, the easiest way to do so is using a DSRL.  Here’s what you’ll need to do, but bear in mind you’ll need to experiment a little due to lighting conditions in your office, and depending on the quality of the x-rays.

  • A DSLR
  • Camera and lens must be on Manual mode
  • An x-ray viewing box
  • You can change the camera to shoot in B&W, or you can change it later
    • I suggest leaving the camera on your normal color mode, as it’s REALLY irritating if you forget to change it back from B&W and take a whole series of shots in B&W that you didn’t mean to do.
    • If you shoot in RAW, as I recommend, it won’t make any difference anyway, it’s super-easy to change in Lightroom
  • TURN THE FLASH OFF!. This is really critical – the flash will ruin them all
  • TURN THE OPERATORY LIGHTS OFF
  • Shutter speed: 1/80
  • f-stop (aperture): 5.6
    • lower f-stops let in more light, and since the x-ray is flat, you don’t need much depth of field
  • ISO: 800
  • Zoom in as tightly as you can to minimize light around the edge of the x-rays.

As you begin taking your first photos, if you need to make some changes, here are some tips:

  1. If possible steady your hand on a counter to minimize hand-shake under the low-light conditions.
  2. When experimenting with settings, only change one at a time
  3. The first setting to experiment with is the ISO.  If the settings above give an image a little too dark, increase the ISO before changing anything else
  4. With cameras prior to 2010, ISO 800 may be the highest you can go without too much noise/grain appearing in your photos .
  5. With cameras from 2012 and on, you can probably go as high as ISO 2000 or even 4000 without much noise, but you won’t need to do so.
  6. The second setting to change if necessary is the f-stop.  Drop it lower (smaller number), but it will be a bit tougher to keep the image in focus if you get all the way down to f/2.8
  7. A shutter speed of 1/80 is probably the lowest you’ll want to go; much lower than that, and your hands will be harder to keep steady enough to prevent shake.

Good luck!  If you have other tips for successfully converting old film x-rays to digital, I’d love to hear about them, too!

2012 Ends and 2013 Begins

December 30, 2012 by Charles Payet

As 2012 is wrapping up, I thought I’d share one particular graphic from my annual WordPress.com report received today, as it is just pretty darn amazing to me and really illustrates the power we have to reach the world through the Web.  The graphic sums it all up – 147 countries!

Internationally-read blog about dental digital photography by Charlotte NC dentist Dr. Payet

Lightroom Smart Collections Make Photo Selection Easy

December 2, 2012 by Charles Payet

Have you ever wanted to find some patient photos from several years ago, but couldn’t remember the patient’s name?  Maybe you’re updating your website with some new photos, and it was a great veneer case, but the patient moved away, and you’re completely stumped?  Especially if you’re using your Practice Management Software (PMS), this becomes a virtually impossible problem to resolve. So how do you manage this?

Adobe Lightroom Smart Collections for Dentists

lightroom smart collections automatically collect photos by keywordOne of the most powerful and useful tools for dentists managing their dental photography catalogs, is the Lightroom Smart Collections feature.  Based (usually) on keywords that you’ve assigned to your photos, whether on importing them or adding them later, Smart Collections automatically collect all photos with a given keyword.  You can also create Smart Collections to collect photos with a certain Rating (1-5 stars), Color Label (red, green, yellow, purple, blue), Metadata (date taken, GPS location if your camera has this feature, etc), or even combinations of criteria.

Keep Your Patient Photos Well-Organized

I’ve already discussed a basic structure for organizing dental pictures previously, and as long as you remember the year and procedure type, this can be an easy way to find a patient, because that name should show up in the list of patients under that procedure.  However, if you’ve been practicing long enough and taking enough pictures, this is not always easy.  Where I live, Charlotte NC, is a highly transient area, with lots of professionals moving into and out of town, so we tend to have high patient turnover rates.  In addition, we often have patients driving long distances for our unique combination of services, including LANAP Laser Periodontal TherapyTM, Six-Month Braces, and Cerec Same-Day Crowns, and those patients return to their regular family dentist after their treatment with us is complete.  It’s hard to remember patients we don’t see regularly, right?

Setting Up Your Smart Collections

When thinking of all the possible ways and combinations you could set up Smart Collections, the enormous possibilities can seem daunting.  Remember, though, you only need to do this for image sets that you really want to track over time.  This type of organization is very useful for dental lecturers and for anyone wanting to use your own photos in your marketing.  Theoretically, this might include sets as follows:

  • Dental Implants
    • Straumann
    • Implant Direct
    • Blue Sky Bio
  • Porcelain Veneers
  • Crowns
    • Lab-made
    • Cerec
  • Whitening
  • Six-Month Braces
  • Invisalign
For example, since I’ve started taking photos through my Leica M320 Dental Microscope, I use a Smart Collection based on the keyword “microscope” as an easy way to sort out those photos taken through the scope, rather than with the conventional DSLR set-up.
Smart Collections Save Time

If you’re anything like I am, with a dental photo catalog of nearly 65,000 images over the last 8 years, and you want to find photos of a given subject, without having to remember every patient name and sort through them all, Smart Collections are the way to go.  Because they  AUTOMATICALLY collect every photo in your catalog with the criteria you select, they’re a huge time-saver.

Learn to use Adobe Photoshop Lightroom Smart Collections, and you’ll make your life so much easier, any time you need to find one or more photos, but don’t remember the patient’s name, or if you want to find photos from a lot of patients of a certain procedure, material, etc.

Please let me know in the comments if you have any questions, or if you’ve found other easy ways to organize your photos!

Shade Matching Made Easy

October 29, 2012 by Charles Payet

Do you struggle with taking accurate shades for challenging anterior cosmetic dentistry cases, such as large composite resins or porcelain crowns? Like most of you, I’ve always considered this one of the hardest aspects of dentistry, even with the power of digital photography.  Now, however, a new tool has arrived that promises to revolutionize and simplify this challenge.  It’s easy to use, affordable, and the most powerful tool for analyzing and communicating hue, value, and chroma in our dental restorations that I have ever used.

The polar_eyes Cross-Polarizing Filter

Shade matching in cosmetic dentistry is easy with the polar_eyes filter I first learned about this revolutionary new filter design on Facebook from Dr. Jason Smithson, whose composite resin artistry easily rivals that of the best lab technicians. Designed by Dr. Panaghiotis Bazos, a Greek dentist trained at the University of Southern California (Class of 2000), this filter is easily attached to Canon, Nikon, Sigma, and Metz ring flashes.

Color is Complicated

Just recently,  Dr. Lane Ochi posted an Online CE Course on DentalTown.com that uses Color Theory to teach how we perceive color, and while I had learned some of this earlier, he gives the most thorough description I’ve seen – highly recommended.  Fair warning – you’ll probably want to review it several times to really absorb the material, because he packs a LOT into that 1-hour course.

In simple terms, however, one of the biggest challenges we face when taking shades for cosmetic dentistry, whether porcelain or composite, is the reflection of light from the teeth, whether that reflection comes from overhead lights, ceiling lights, or the camera flash.  The human eye has difficulty dealing with how that reflection can hide details of color.  And given that most of us aren’t trained in truly understanding color, even if we can see it, how do we communicate it to the lab?   For years, dentists have used different kinds of shade-matching devices, but based on many reviews, none of them have been particularly easy to use, and most of them are expensive.

Eliminate the Glare, and What’s Left is Color and Brightness

Removing light reflection from teeth with the polar_eyes filter lets color come throughTake a look at this example photo (courtesy of Dr. Bazos), and what do you see?  On the right side of the photo is what we typically see in DSLR photos taken with a ring flash, and on the left side is how teeth look  when photographed using the same exact settings and the polar_eyes cross-polarizing filter.  The difference is striking and easy to understand.

Since this blog is dedicated to making dental photography easy-to-understand, at this time, I am not going to discuss what exactly cross-polarization is, because it’s not really necessary to understand it to use this cool little device.  Perhaps at a later date.

The polar_eyes is incredibly easy to install, but it’s a little tricky to keep in place for Canon flashes due to the flash design (not the filter design).  Attached by a set of stick-on magnets, it is easily set up on your flash in about 2 minutes (if you’re really slow at reading the directions).  Press the sticky side of the magnets to a clean flash surface, and you’re good to go!  The filter is removed by gently sliding the filter up for down – you don’t want to pull it off, as the magnets can pull off, too.  Don’t ask me how I know, ok?  😉

Where to Buy the polar_eyes?

Dr. Bazos has made the polar_eyes exclusively available through www.Photomed.net in the USA.  Outside the USA, you will need to contact Dr. Bazos directly.

Cost: This is the absolute best part – it’s only $499!  Extra sets of magnets (highly recommended by me to be on the safe side) will be a bit more, but as of the time I purchased mine, the price for them had not yet been determined.  But compared to almost any other system currently available, this is super-affordable and amazingly easy to use.  Literally, the first time you take a photo with it and look, you will love it.

More details and tutorials will be upcoming, so be on the lookout.

  • Go to page 1
  • Go to page 2
  • Go to page 3
  • Interim pages omitted …
  • Go to page 6
  • Go to Next Page »

Copyright © 2023 · Atmosphere Pro on Genesis Framework · WordPress · Log in


Loading Comments...