• Skip to main content

Digital Dental Photography

Digital Photography and Workflow for Dentists

  • Home
  • Gear
    • Accessories
  • Clinical Dental Photography
    • Basic Settings
    • Patient and Camera Positions
    • Quadrants and Occlusals
    • Extraoral Photos
  • Software
    • Photo Organization
  • Portrait Photography Basics
  • Dental Websites
    • WordPress Websites
  • CE Reviews

Learning Photographic Techniques

Convert Film X-rays to Digital Photos

January 1, 2013 by Charles Payet

I was just asked a question on how to take digital photos of film x-rays in order to digitize them, and realized this is a frequent question on DentalTown that can easily be answered.  Fortunately, it’s quite easy!

How to Take Digital Photos of Film X-rays

There used to be some flatbed scanners available that could be used to scan individual x-rays, panoramics, and full-mouth series, but as I understand it, those are fairly expensive and not easy to find any longer, probably  because the demand wasn’t very high.  So if you want to digitize your old film x-rays to load into your PMS, whether for simple archiving and space storage, or to make it easier for your team to access them quickly, the easiest way to do so is using a DSRL.  Here’s what you’ll need to do, but bear in mind you’ll need to experiment a little due to lighting conditions in your office, and depending on the quality of the x-rays.

  • A DSLR
  • Camera and lens must be on Manual mode
  • An x-ray viewing box
  • You can change the camera to shoot in B&W, or you can change it later
    • I suggest leaving the camera on your normal color mode, as it’s REALLY irritating if you forget to change it back from B&W and take a whole series of shots in B&W that you didn’t mean to do.
    • If you shoot in RAW, as I recommend, it won’t make any difference anyway, it’s super-easy to change in Lightroom
  • TURN THE FLASH OFF!. This is really critical – the flash will ruin them all
  • TURN THE OPERATORY LIGHTS OFF
  • Shutter speed: 1/80
  • f-stop (aperture): 5.6
    • lower f-stops let in more light, and since the x-ray is flat, you don’t need much depth of field
  • ISO: 800
  • Zoom in as tightly as you can to minimize light around the edge of the x-rays.

As you begin taking your first photos, if you need to make some changes, here are some tips:

  1. If possible steady your hand on a counter to minimize hand-shake under the low-light conditions.
  2. When experimenting with settings, only change one at a time
  3. The first setting to experiment with is the ISO.  If the settings above give an image a little too dark, increase the ISO before changing anything else
  4. With cameras prior to 2010, ISO 800 may be the highest you can go without too much noise/grain appearing in your photos .
  5. With cameras from 2012 and on, you can probably go as high as ISO 2000 or even 4000 without much noise, but you won’t need to do so.
  6. The second setting to change if necessary is the f-stop.  Drop it lower (smaller number), but it will be a bit tougher to keep the image in focus if you get all the way down to f/2.8
  7. A shutter speed of 1/80 is probably the lowest you’ll want to go; much lower than that, and your hands will be harder to keep steady enough to prevent shake.

Good luck!  If you have other tips for successfully converting old film x-rays to digital, I’d love to hear about them, too!

Photography Should be Fun Part 2

August 10, 2012 by Charles Payet

Building again on the theme that the best way to learn photography, is to take photos of things besides teeth, here’s an adventure for which I’ve signed up, and to which you are certainly invited, too!

The NY Photowalk with Joel Tjintjelaar & Co.

As I mentioned in my previous post about the Google+ One-Year Anniversary Photowalk, Google+ has become a worldwide forum for photographers of all levels, and many of the world’s best photographers do post and interact there.  Pretty darn cool, if you ask me.  🙂  Many of those amazing photographers offer hands-on learning seminars in the field, just as with hands-on dental CE, and those seminars are a great way to expand your knowledge of photography.

One such event is the NY Photowalk, which will be held this coming November 10-14, 2012, with some international award-winning photographers:

  • Joel Tjintjelaar
  • Sharon Tenenbaum
  • Armand Dijcks
Here’s the details if you’re interested.

NY Photo Walk originally shared:
4th and Formal Announcement: New York City
 Architectural Photography Walk / Course – Nov. 10 – 13, 2012 – Detailed Route Information and a few surprises

BEGINNER OR ADVANCED,
come join us to take your photography to the next level!
Registration space is limited so hurry to sign up now as the clock is ticking and we’re getting closer to the start date!

DETAILED ROUTES (NEW!)
The 4 day detailed walk routes are now available for online viewing on Google Maps https://maps.google.com/maps/ms?msid=201545091262127996664.0004c5be4758671b5e402&msa=0
and as downloadable JPG files on our +NY Photo Walk page https://plus.google.com/b/102406418598992189071/photos/102406418598992189071/albums/5769968179604251985

SPECIAL GUEST SPEAKER MARC KOEGEL (NEW!)
We are excited to announce that Marc will be honoring us with a guest lecture. Marc Koegel is professional commercial and award winning fine art photographer, educator, writer and director of the Vancouver Photo Workshops Studio.
His black and white landscapes, nudes and architectural photographs have been widely exhibited in Canada, US and Europe.

FREE PHOTO GIVE-AWAY PRIZES (NEW!)
Joel and Sharon will be giving out free hand signed Fine Art prints as draw prizes!

HOTEL RECOMMENDATIONS, DETAILED DAILY SCHEDULES, INFORMATION ON LOCATIONS/BUILDINGS
Hotel recommendations, detailed daily schedules and information about each location/buildings will follow in the next announcements – Keep Posted.

FOR MORE INFO ON THE INSTRUCTIONAL SESSIONS CHECK OUR PREVIOUS ANNOUNCEMENTS OR SEE BELOW FOR A SUMMARY

ADVANCED B&W POST PROCESSING TECHNIQUES AND 3 WEEKS OF ONLINE PORTFOLIO REVIEWS POST-COURSE WITH JOEL TJINTJELAAR’S B&W MASTERCLASS
Joel will reveal in detail and step by step how he creates award winning B&W photographs using software like Photoshop and Silver Efex Pro2. An important part of Joel’s instructional B&W post processing sessions will be on the processing of architectural photographs. A part that doesn’t end with the NYC workshop on November 13 but will be extended online for 3 weeks post-workshop with reviewing and online support on image post-processing.

TRANSFORMING PHOTOGRAPHY INTO ART BY DEVELOPING VISION
Learn to cultivate ‘The Eye’ of a Fine Art Photographer by developing a deeper understanding of Architectural Photography with +Sharon Tenenbaum and +Joel Tjintjelaar Learn to see the geometric relationships of structures and their surroundings.

*LONG EXPOSURE PHOTOGRAPHY*
• From the basics to more advanced techniques in combining still shots with Long Exposure Photography.
• Specific art tips for Long Exposure photography.
• Joel will be teaching his advanced techniques in B&W post processing using Silver Efex Pro 2 software.

PORTFOLIO REVIEWS
• Bring your own previous work for evaluation and constructive critique.
• Up to three weeks of post course online help and guidance of your photographs.

LEARN HOW TO USE YOUR DSLR TO CAPTURE MOTION PICTURES WITH CINEMATOGRAPHER +Armand Dijcks :
Cinematographer/photographer +Armand Dijcks will introduce you to the world of DSLR cinematography. Your DSLR camera is capable of capturing very high quality video images, but there are so many new things to learn when creating moving images that it may seem daunting. Armand will explain the key concepts, building on the things you already know as a photographer, so that you can expand your creativity using this new medium.

A photographic experience never to forget; this event will be recorded on video in documentary / fine art style, by one of the most talented and upcoming cinematographers +Armand Dijcks

SIGN UP HERE – LIMITED AVAILABILITY!
Click HEREhttps://docs.google.com/spreadsheet/viewform?formkey=dEtneDE4VmlVWXpGNy1wSnJZRnM4Tnc6MQ to Register

*Course Fee: 975USD (does not include flight or accommodation).  Detailed routes, schedule, and hotel recommendations will be revealed soon.
** A final video tutorial and ‘out in the field’ instructional sessions documented throughout the course will be provided free of charge to all participants.
* Maximum of 30 participants.

Contact Info:
Daniel Portal (General Inquiries): dportal@gmail.com
Joel Tjintjelaar: info.bwvision@gmail.com
Sharon Tenenbaum: sharon@SharonTenenbaum.com

REFUNDS AND CANCELLATIONS:
All payments are refundable upon request of cancellation (except a $50 processing fee and the Paypal fee of 2.9%). Cancellations (except mentioned fees) are in full up to 90 days prior to departure. Cancellations between 89 and 60 days prior to departure are subject to 50% of total in charges, between 59 and 30 days, 75% and no refunds will be issued with 29 days or less of notice. If payment is not received in full 90 days prior to departure we cannot guarantee your spot on the workshop. Any participant wishing to register in full can take that spot.   In the event of low registration the event will be cancelled.  In this event fees will be refunded in full.104    27 Powered by socialditto

Photography Should be Fun

July 5, 2012 by Charles Payet

On a personal level and in a break from the serious nature of my last few postings, I want to discuss a very serious topic, which is namely this:

Get Out There and Have FUN with your Camera!

In all seriousness, photography has become one of my most-enjoyed hobbies ever, and it is both a fun challenge and just pure enjoyment to get out the camera and gear and go shoot with no purpose in mind but to have FUN!

As it happens, there are 3 places where I’ve nurtured the enjoyment of photography, while learning some of the finer points of both shooting and post-processing images, usually with Adobe Photoshop Lightroom and Photoshop CS6; these days, I’m also experimenting with Nik’s software, such as HDR Efex 2, Silver Efex 2, and a couple others.  These 3 places are:

  1. The Aspiring Photographer’s thread on DentalTown (you have to be a dental professional to be a member)
  2. The FredMiranda.com Landscapes forum
  3. Google+

In the year since Google+ launched, it has become one of the biggest worldwide communities of photographers, and it is amazing to see the talent shared there.  I do find that FredMiranda.com is a better place to receive constructive critique, because it’s easier to be noticed there if you start a thread, while it’s easy to be buried in the constant stream of photos, and you need to be noticed and circled by enough people to have your images spread, but still…….G+ is great.

The Google Plus One-Year Photowalk

June 30th, 2012 happened to be the Google+ One-Year Anniversary, so a man named Thomas Hawke started the idea of a worldwide Photowalk to be held that day, and the response was phenomenal!  Here in Charlotte, NC we had nearly 20 people show up, which was even more remarkable given the 100-105 degree temperatures.  Getting together with a bunch of other people, none of whom I’d met previously, ended up being a lot of fun and pushed my photographic limits, as I’ve never done much architectural or street photography.  But here are a few shots from that blistering Saturday evening:

If you’re paying attention, you’ll notice that I have not placed any watermarks on these photos.  Given my recent blog posts, you may wonder why, and there’s a fairly simple reason….I’m just not worried about anyone stealing these images.  Naturally, I would prefer that they not, but none of these shots is likely to be worthy of selling prints or otherwise being highly valuable.

But the real message: if you want to get GOOD at photography, and if you want to learn the most about it, get the camera out of the office and go shoot some stuff besides teeth!

Please share links to your own photo galleries, websites, or tell me what you enjoy shooting outside the office in the comments.

Finally Getting to Take Pictures Again!

August 30, 2011 by Charles Payet

Over the last 18 months or so, I have been working so hard on my dental practice, and my websites, that I’ve had little time to actually be a photographer, which is truly a passion.  The last time I got to do any real shooting was when we took a family vacation to Hawaii in April 2010, but even that was just snapshots of a vacation, not planned, scouted, and visualized in advance for the best shots.  But that is about to change!

My Passion for Photography Outside Dentistry

A few years ago, I came upon a fabulous photography forum: FredMiranda.com.  A free site (you do have to sign up to post photos, but there are no fees for most things), they have a wide variety of forums, from weddings to landscapes to sports to wildlife, etc.  I learned a tremendous amount just by reading and viewing, then gathered the courage to post some photos and received some very constructive critique.

One photographer, whom I came to greatly admire, is Mark Metternich, and you can see his landscape photography on his website: WildforLight.com.  Around the end of 2008, I was exploring the idea of supplementing our family income with some photography (back in the midst of the economic crisis, anything seemed like a good idea!), and Mark was kind enough to spend some time with me on the phone, explaining some possibilities.  It didn’t pan out, but he did push me to start building my own photography website, www.CDPayetPhotography.com.

Landscape Photography Expedition in Oregon

Mark also told me that he does photography tours of the Southwest and the Northwest, and the idea fascinated me.  To spend an extended time totally devoted to landscape photography…..back in those days, it was a pipe dream for financial reasons, but the dream took hold, and it became a real goal to make it happen.  And earlier this year (spring of 2011), the time was finally right to make a commitment and schedule a trip, so I called Mark up and said, “Let’s do it!”

This coming Friday, September 1st, I will be taking off for Portland, OR, to be picked up by Mark, and we will be heading out for a full week of landscape photography at a level that I have never before reached.  I am so incredibly excited, I can barely make it through the next 2 days of work!

I don’t know if we will have much in the way of Internet access, and I don’t plan on taking a laptop this time, so I’m not sure yet if I will be able to blog my way (with photos) through the trip, but I am going to try.  If not, I’ll be doing a huge amount of post-processing for weeks afterwards, and I do plan on using this as a place to share (partially because I am going to be testing out some new WordPress photo gallery plugins).

Google+ Is the New Photography-Sharing Site

Is anyone else on Google+, their new social media platform?  If you are, it is rapidbly becoming a photographer’s dream – there are some amazing photographers on there!  If you’re interested in joinging Google+, please give me your email, and I’ll be glad to send you an invitation.


Cosmetic Dentistry Portraits

February 23, 2011 by Charles Payet

Use Photo-Sharing Sites to Spread Your Pictures Around the Web

The portrait you see below (and you can click on it to see what happens) was posted directly from my photography website, which was actually the very first one I built, although not from scratch.  It is hosted with SmugMug as a Pro account for various reasons, one of which does happen to include ability to automatically watermark images in entire galleries quite easily.  There are certainly other options, such as Google’s Picasa Web Albums, Flickr, Zenfolio, etc..

This is just a short post to show an example of how you can spread pictures around the web easily, on your own, with no need for a web designer.  Simply create an account yourself (I do recommend setting up one specifically for the office, separate from any personal photo accounts you have), and upload pictures from your computer, then use the “Share” button to get your work out there for patients to see.  And really, the more places, the better!


Phaedra chose 6MonthSmiles to correct some mild crowding of her top front teeth, as she'd been self-conscious about them for years.  Now she loves her smile!Phaedra chose 6MonthSmiles to correct some mild crowding of her top front teeth, as she’d been self-conscious about them for years. Now she loves her smile!

To Take Better Dental Pictures: Take Your Camera Home

February 11, 2011 by Charles Payet

Yes, you read that right!  Take your camera home and experiment with it.  Especially if you are a newbie to digital photography beyond the P&S cameras for family.

Understand the Fundamentals of Photography

for Ideal Dental Photos by Having FUN


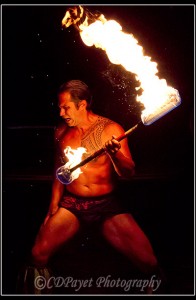
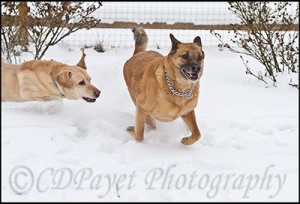
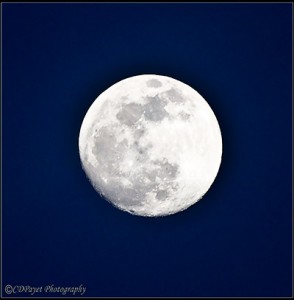
While you don’t HAVE to understand how DSLR cameras work in order to get the best results (visit our page on basic settings for dental intraoral and extraoral photography for my recommendations), it is a lot easier to do so, and a lot more fun, if you do learn.  And the easiest and most enjoyable way to learn, is simply to take your camera home and shoot as many pictures as you can.  One warning however……it can get addictive! My personal home photo catalog is nearly 27,000 images, and my work catalog is now over 45,000.  😀 Some examples (click on the image for larger versions):


Every one of these images required understanding different combinations of ISO, aperture, shutter speed, etc.  As I said, you don’t NEED to learn this, but if you do, you will then really KNOW how to take the pictures you want, especially when you want to start taking fun portraits.  And you’ll end up with more exciting and dramatic pictures of your family and vacations.


OK, so I was having a bit of fun just “showing off” a few of my favorite photos 😀 , but I think you get the point, right?  Realistically, shooting your family and pets around the house and neighborhood will give you the closest comparison to what you will shoot for patients, as you can see the effect of different combinations of aperture and shutter speed.

Use Extremes in Aperture and Shutter Speed to Experiment– on MANUAL MODE

If you always have the camera on full Automatic, you don’t have to think, right?  So to really see what happens, make sure the camera is on (M)anual on your top dial; do leave the lens on (A)utofocus to minimize the aggravation of having out-of-focus pictures of your kids, especially if they’re like mine and move fast.

Experiment #1:

  • ISO 100
  • WB: Cloudy
  • Shutter speed: 1/200
  • Aperture: f/3.5

Experiment #1a: Keep everything the same except change Aperture to f/15

Experiment #1b: Keep everything the same except change Shutter speed to 1/80

Experiment #1c: Keep everything the same except change WB to Tungsten

Use a Notebook to keep track

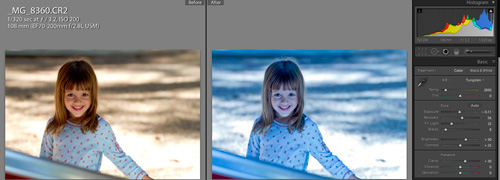
If you’re not familiar with using the Metadata that is automatically captured with very image, then consider keeping a notebok and writing down each combination per picture.  Yes, I know this can be a bit time-consuming, but it is a time-honored tradition that works very well.  Of course, if you take a minute and learn where to see the Metadata within your photo software, then you can look at each image and compare on screen, best using a side-by-side view as below.

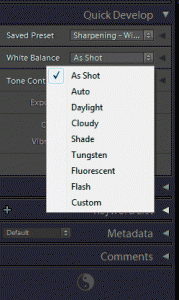
Shoot RAW and you can change the WB within your software

Obviously, once you’ve taken the picture, you can’t change most of the settings.  There is ONE setting, however, that you can change in your software if you have been shooting RAW images, and that is the White Balance (WB).  This allows you to experiment a bit more easily, as you can leave the WB setting the same for every picture, then just switch the setting on the computer and immediately see how it changes.  At left is what the drop-down menu looks like in Lightroom.

Recommended Reading:

Understanding Exposure by Bryan Peterson is one of the best books for getting a good grasp of these concepts.  And once you have become more comfortable with the fundamentals, then read any of his next books to keep going.

For taking routine intraoral and extraoral dental pictures, the main benefit to learning these concepts will be to help you troubleshoot your pictures.   The fun part, though, will come when you start taking more patient portraits (as shown on my dental website).

Copyright © 2025 · Atmosphere Pro on Genesis Framework · WordPress · Log in


Loading Comments...